Hello there,
I am back to blogging after a long time. Hopefully I will find time to post regularly. I am very happy and excited to be part of the Design team at INDIAN QUILLING CHALLENGES GROUP.
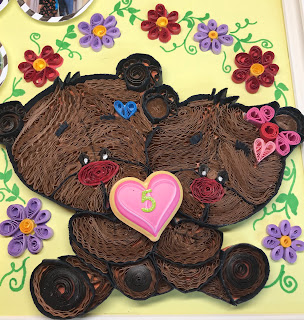
This is my first DT post. The topic of the challenge being MY PASSION MY LOVE, I decided to quill teddy bears in love. For a long time I wanted to try something with furry effect. The main technique used in this project is Crimping.
These quilled teddy bears in a floral garland I decided to use it in a photo inclusive layout and framed it in a double matted silver frame. The framed work is a 5th anniversary keepsake of a lovely couple depicting their five year journey..
Quilling techniques used

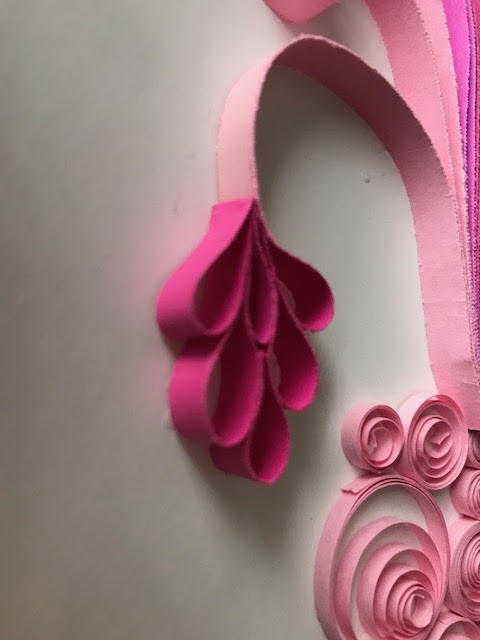
I took a printed drawing of the picture and did the Edge work with black quilling strip(I cut my own card stock strips)Filled the bear with crimped brown strips with stacking method.Added hearts and the ribbon bow in respective colours by making a a teardrop. I used the beehive technique for the ears. For the foot and centre of flowers tight/loose coils are used. I made a few flowers and arranged it in a arch around the teddies and using sharpie drew the branches.
Arranged these along with the photos of the couple on a yellow cardstock. Added few wooden sentiments to complete the look..


I am back to blogging after a long time. Hopefully I will find time to post regularly. I am very happy and excited to be part of the Design team at INDIAN QUILLING CHALLENGES GROUP.
This is my first DT post. The topic of the challenge being MY PASSION MY LOVE, I decided to quill teddy bears in love. For a long time I wanted to try something with furry effect. The main technique used in this project is Crimping.
These quilled teddy bears in a floral garland I decided to use it in a photo inclusive layout and framed it in a double matted silver frame. The framed work is a 5th anniversary keepsake of a lovely couple depicting their five year journey..
Quilling techniques used
1. Crimping
2. Tight Coil/loose coil
3. Edgework
4. Teardrop
5. Beehive
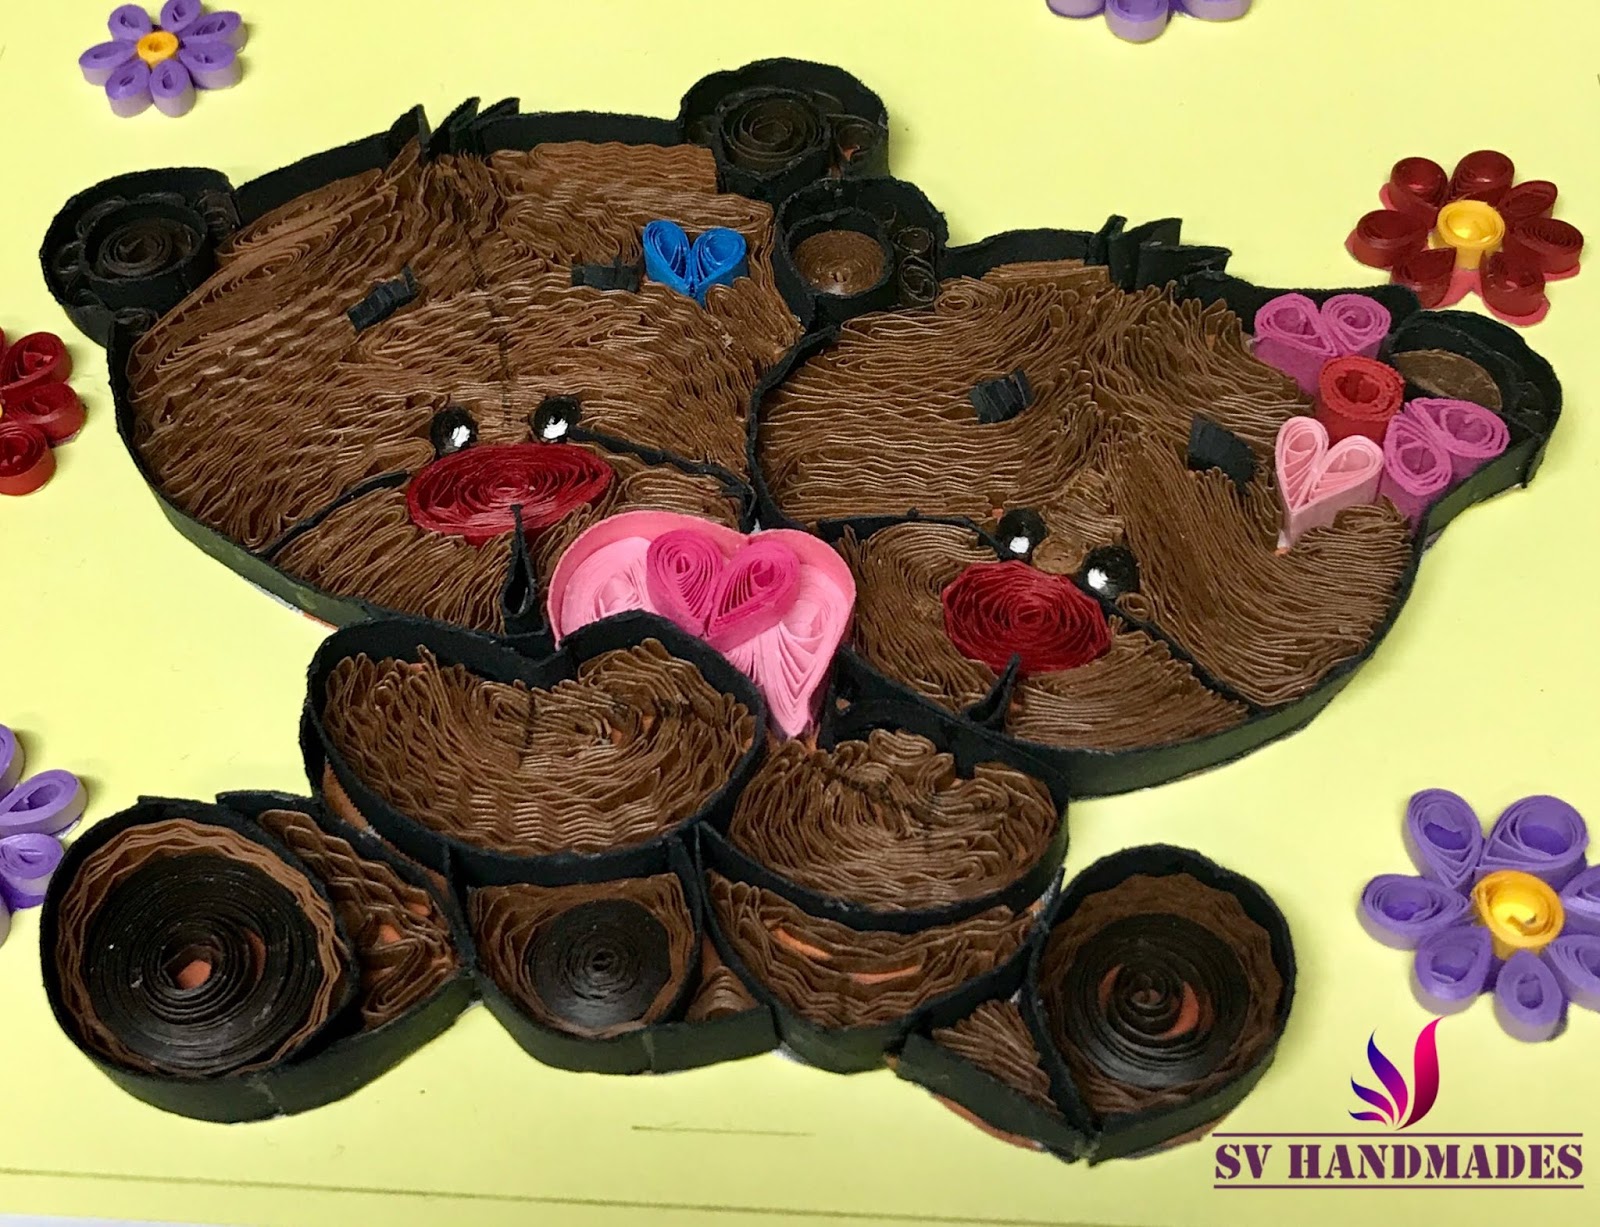
I took a printed drawing of the picture and did the Edge work with black quilling strip(I cut my own card stock strips)Filled the bear with crimped brown strips with stacking method.Added hearts and the ribbon bow in respective colours by making a a teardrop. I used the beehive technique for the ears. For the foot and centre of flowers tight/loose coils are used. I made a few flowers and arranged it in a arch around the teddies and using sharpie drew the branches.
Arranged these along with the photos of the couple on a yellow cardstock. Added few wooden sentiments to complete the look..