Search This Blog

Showing posts with label wall decor. Show all posts

Tuesday, February 19, 2019

Typography and edgework 1 nameboard

Hi all,


Let me first apologize for not updating my blog.  Had been busy with lot of  custom orders.

This post is about making a wall frame with a quilled name. This was done in May 2018.  Better late than never.  Let me get to it.


The requirement was in shades of  pink colour for a girls room.  So I selected various shades of pink  (almost 7 different shades) in varous widths.


 I decided to make the actual name in white to make it stand out.  I cut my own strip from white cardstock.  On a white cardstock background I pasted the completed name (Technique Typography).  To incorporate the various shades I decided to make it like a gradient.   Made swirls from the strips and glued  them on  around the name.


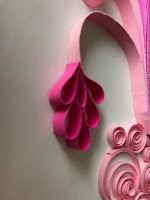
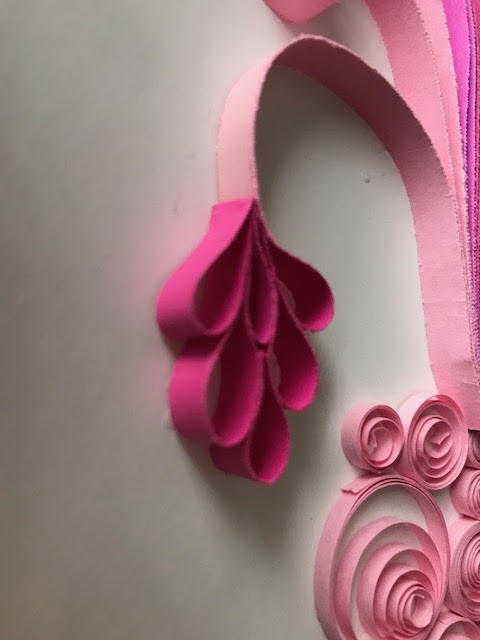
To give impression of a crown I made a floral design above the first alphabet of the girls name.  To make the floral shape i pinched the swirls at one end to make a teardrop for the petal and made a tight coil with a contrast colour for the centre.  To give dimension to the work I added few tight coils randomly in between the swirls.


To make the wall decor more personalized I decided to incorporate the  picture of the girl into the frame. So made a circular frame with quilling strip and cut the photo to fit in and placed it on the top right corner.

Added few concentric circles with border buddy and made a scroll with two colour strips glued together.  added few other curved scrolls and tear drop shaped to fill in the space on the top.

Now for the bottom portion I added two flowers and  multicoloured scrolls to fill the spaces.

Hope you like my work.  Feel free to leave your comments. Those who wish to try doing this can do so. Any doubts you have I will be happy to clear them and help you create your masterpiece.


Happy quilling!!!

Saturday, March 17, 2018

1st Birthday Theme


This exciting order on commission was a real challenge to me.  My
sweet customer really brings the best
out of me. My challenge was to incorporate photos into the frame and should be in the form of a wish..  After a lot of trials and rearrangement finally decided on the placement.


Baby Ishaan's 1st birthday gift  with his new born picture accomodated into the quilled numeral  flanked by the quilled baby elephant so apt for the theme.


Birthday quilling and balloons cannot be far behind.  I added a small bunch of free standing quilled balloons.


To add to the baby theme  I added the sentiments laugh and smiles near the baby picture  and randomly placed different kinds of ball stickers


My first experience making a typography quilling. I am very happy with the result.


To glam up the birthday theme, I added a bunting with mixed media.


On the whole a fun experience making this aweosme  16x20  framed art work.  Actual work is contained in the mat opening of 11x14.   I will happy to commission any kind of art.  Do mail me at yesveecreations@gmail.com  with your requirements.


I have entered this project for the following challenges
Indian quilling challenge #45
International Art and soul ch 29

Tuesday, February 27, 2018

Quilled Monarch Butterfly

Hi craft enthusiasts,   

This is my first blog post on crafts.  Let me start with my favourite crafting Quilling.  My passion towards quilling began when my friend shared some of her work on our whatsapp group.  She said she went overseas to learn this art and had mastered it.  she had already started teaching this art when i just heard it for the first time. 


I am a very crafty person from childhood. I used  to do  lot of crafts during  my school days.  when I heard about this art, I wondered how I was ignorant  about this art this long.  I started googling  and my interest was kindled.  I learnt the basic techniques.  Joined various facebook groups to know where to start.  My first project was making jewellery.  I will make seperate posts discussing the basics of quilling and and how to make jewellery based on this art.

Today we stay focussed on this piece of wall art.  I love gardening and admire watching butterflies in my garden.  So I chose the gorgeous Monarch butterfly as my theme.


First step to creating a Masterpiece

1.   Decide on the base of your work
2.  Get your image either drawn or  printed
3.  Get your materials ready
4.  You are good to begin 


Materials needed

Quilling needle
black 5 mm strips
orange 5 mm strips
brown 5mm strips
yellow 5 mm strips
white 5mm strips
A sheet of cardstock
white glue
picture of a monarch butterfly for reference
a shadow box frame
This was my base picture, a googled image.  I printed it out, and pinned it to my work surface.
Using your quilling tool  roll circles with black strips and start pasting on the picture by appling glue.  Cut your strips smaller and roll smaller circles according to the space on the picture. You have to completely fill the black portion by shaping your quilled circles accordingly


Once you complete the wing portion with black, start with the white circles on the edge of the wings. make a spindle shape with black quilling strips for the body and paste it down.  Add a oval shape for the head and a piece of strip for feelers.

Phew!!!  you just finished up the most difficult and time consuming part of the project.  I assure you the coloured portion will be done in no time. Quill drop shapes in yellow, orange, brown and fill up the spaces.  

To give a better appearance add black strips on the lines you see on the picture to mark each segment of the wing.  And you are done with the creating the most beautiful quilled piece.

After you complete the quilled piece you have to make it a wall decor and protect your hard work from dust.  Open up the shadow box frame.  Insert the quilled art.  Secure with cellotape at the back and lock the tabs at the back.  And your art is all ready to adorn your wall.


Hope you all liked my work.  Happy Quilling!!!
Thanks for stopping by.💗
If you wish to purchase this art visit the link


Friday, February 9, 2018

Balloons of love

Hello  crafters


The project I worked on this month is a bunch of heart shaped balloons in valentine colours.  I loved working on this project.  This is done on a commission so it includes the initials of the person concerned.

I submit this entry to the following blogs

Indian quilling challenge 

unicorn challenge

Stinkininkers

Love to craft challenge 


The actual piece measures 8x10 inches. And the frame measures 11x14 inches         


The art is protected with  acrylic UV spray. It helps to keep it from fading in years to come.


The quilling technique that I have used here is called beehive


For further enquiries mail us at yesveecreations@gmail.com
Visit our etsy shop  SV Handmades if you are interested in purchasing this art.